
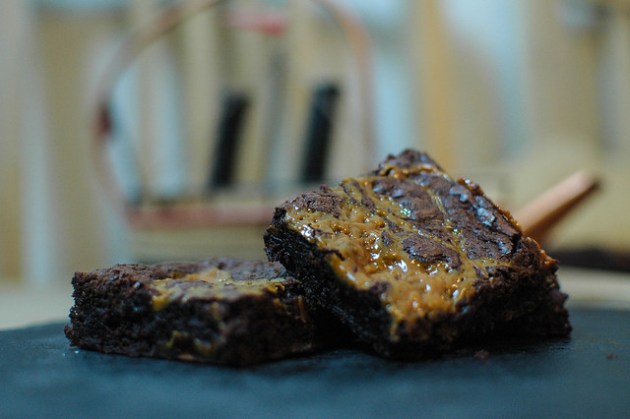
A few weeks ago I took two of my favourite and simplest recipes, and put them together. I took my ultra-indulgent Chocolate Brownies and my Salted Caramel, covered one in the other pre-bake, and made Salted Caramel Brownies. Damn, they are good. Really good. I think I’ve reached peak brownie. They all got eaten before a single photo could even be taken. So I had to re-bake them (such a shame, I know). The trick is to layer half of the brownie mix, then add some caramel, top with the rest of the brownie mix and then enthusiastically drizzle more caramel on top before you stick it in the oven.


I’ve also (finally) got myself a new lighting set up. It’s a bit late, as the days are actually getting longer, but it now means I can take photos on an evening without having to rely on pesky yellow light/half light. It’s been particularly awkward since moving to London. I used to take photos on my lunch break in Leeds, but just can’t do that here, what with not being able to come home at lunch anymore.

Also, I’m looking for a London based Gin buddy. Applications accepted in the comments below. Must be keen on adventures, museums, gin and cake.

- Jar Salted Caramel (Store bought or home made)
- 250g unsalted butter
- 250g best dark chocolate
- 115g plain flour
- 53g cocoa powder
- 4 large eggs
- 370g golden caster sugar
- Melt together the butter and dark chocolate, by placing a heatproof bowl over a saucepan of hot water. Making sure that the water doesn’t touch the bottom of the bowl. Stir the mixture together as it starts to melt, over a low heat. (You can do this stage in the microwave, but I don’t own one). Set the mixture aside to cool to room temperature.
- While it is cooling, preheat the oven to 180°C (160°C fan assisted) and grease/line your tin.
- Over a medium sized bowl, sieve the flour and cocoa powder in together.
- Roughly chop the white and milk chocolate into chips and set aside.
- Break the eggs and caster sugar into the bowl of your electric mixer and whisk on high speed until it looks thick and creamy. This can take anywhere between 3 and 8 minutes. When you take out the paddle, as it dribbles onto the surface and leaves a trail for a second or two then it’s perfect.
- Fold the chocolate mixture into the egg mixture. Slowly folding it until it’s completely incorporated. You want them mixed without knocking out all the air you just added in to the mixture with the whisking.
- Sift the flour mix into the egg/chocolate mix and mix until it’s completely combined. Again, being careful not to knock the air out. Followed by the chocolate chips.
- Pour half the mixture into the prepared tin. Dribble a layer of Salted Caramel (I warm it to make it easier) over the bottom layer. Pour over the rest of the brownie mixture and spread it out gently. Dribble more Salted Caramel on top. How much is up to you.
- Place in the middle shelf of the oven and bake for 25 minutes (20 if using the smaller pan). You’ll be able to see if it is done by wobbling the tray slightly. If the middle wobbles it needs a little longer, so put it back in for another 5 minutes.
- Once cooked, remove from the oven and place on a wire rack, still in the tin and leave to cool completely before removing and dividing in to squares.
I have been trying to coax my mum into baking something like these (she’s a much better bake than I), I may have to leave this post open on her laptop next time I am there, they look and sound delicious.
Hayley @ Tea Party Beauty
These really aren’t a hard bake! You could probably do them yourself. But yeah, tactfully leave it in obvious places.
this sounds like a total dream to me.
They are next level indulgent.
Oh my, these sound delicious!
Thanks Daisy! They are damn good. If I didn’t think it’d kill me/make me obese I’d make them weekly.
Oh my god. These look amazing! This might be both the best and worst blog I have found in a while! All of your bakes look so damn good!
Charlie x
charliecakeandcoffee.wordpress.com
Thank you very much! Definitely make these ones, they are an absolute favourite of mine.
I’m glad you enjoy my blog, and I have no apologies for the food porn!
Mike
Hubba hubba, these sound amazing! Would love to give them a try 🙂
They are, won’t lie. Make some!