Strawberry Drizzle Cake

SUMMER. STRAWBERRIES. FOOD. BAKING. EXCITED NOISES. Yeah, I wanted to do something a little different to last summer’s Strawberry and Cream cupcakes but still strawberry based. So I spent some time looking around this here internet thing (i.e. I did a few googles) and all I was coming across was “such and such topped with strawberries and cream” or “tort with strawberries” and the like. It wasn’t really what I wanted. Until I came across a recipe on the waitrose website, that’s right, waitrose. It of course is “use all of our own brand things to make this cake”, so I went to Tesco, or Asda, or whichever supermarket it was and got all the ingredients cheaper. I’m poor, sorry. Anyway, the recipe is for a Strawberry Drizzle cake. Something, which even when I had decided to make it I was still unsure would work. Strawberry drizzle to me, sounded like it would either be glorious or a bit mushy and odd.

Strawberry Drizzle Cake 08

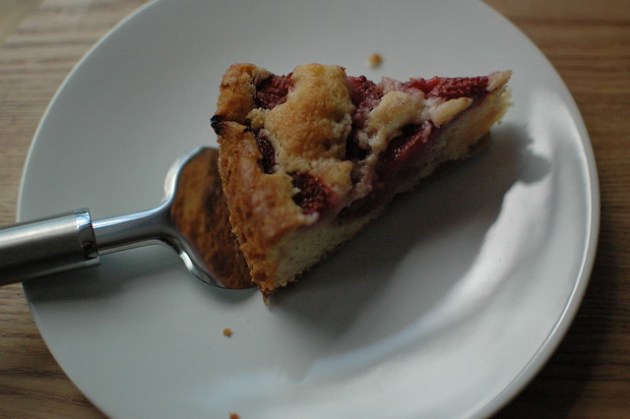
Fortunately it was glorious.

Strawberry Drizzle Cake 01


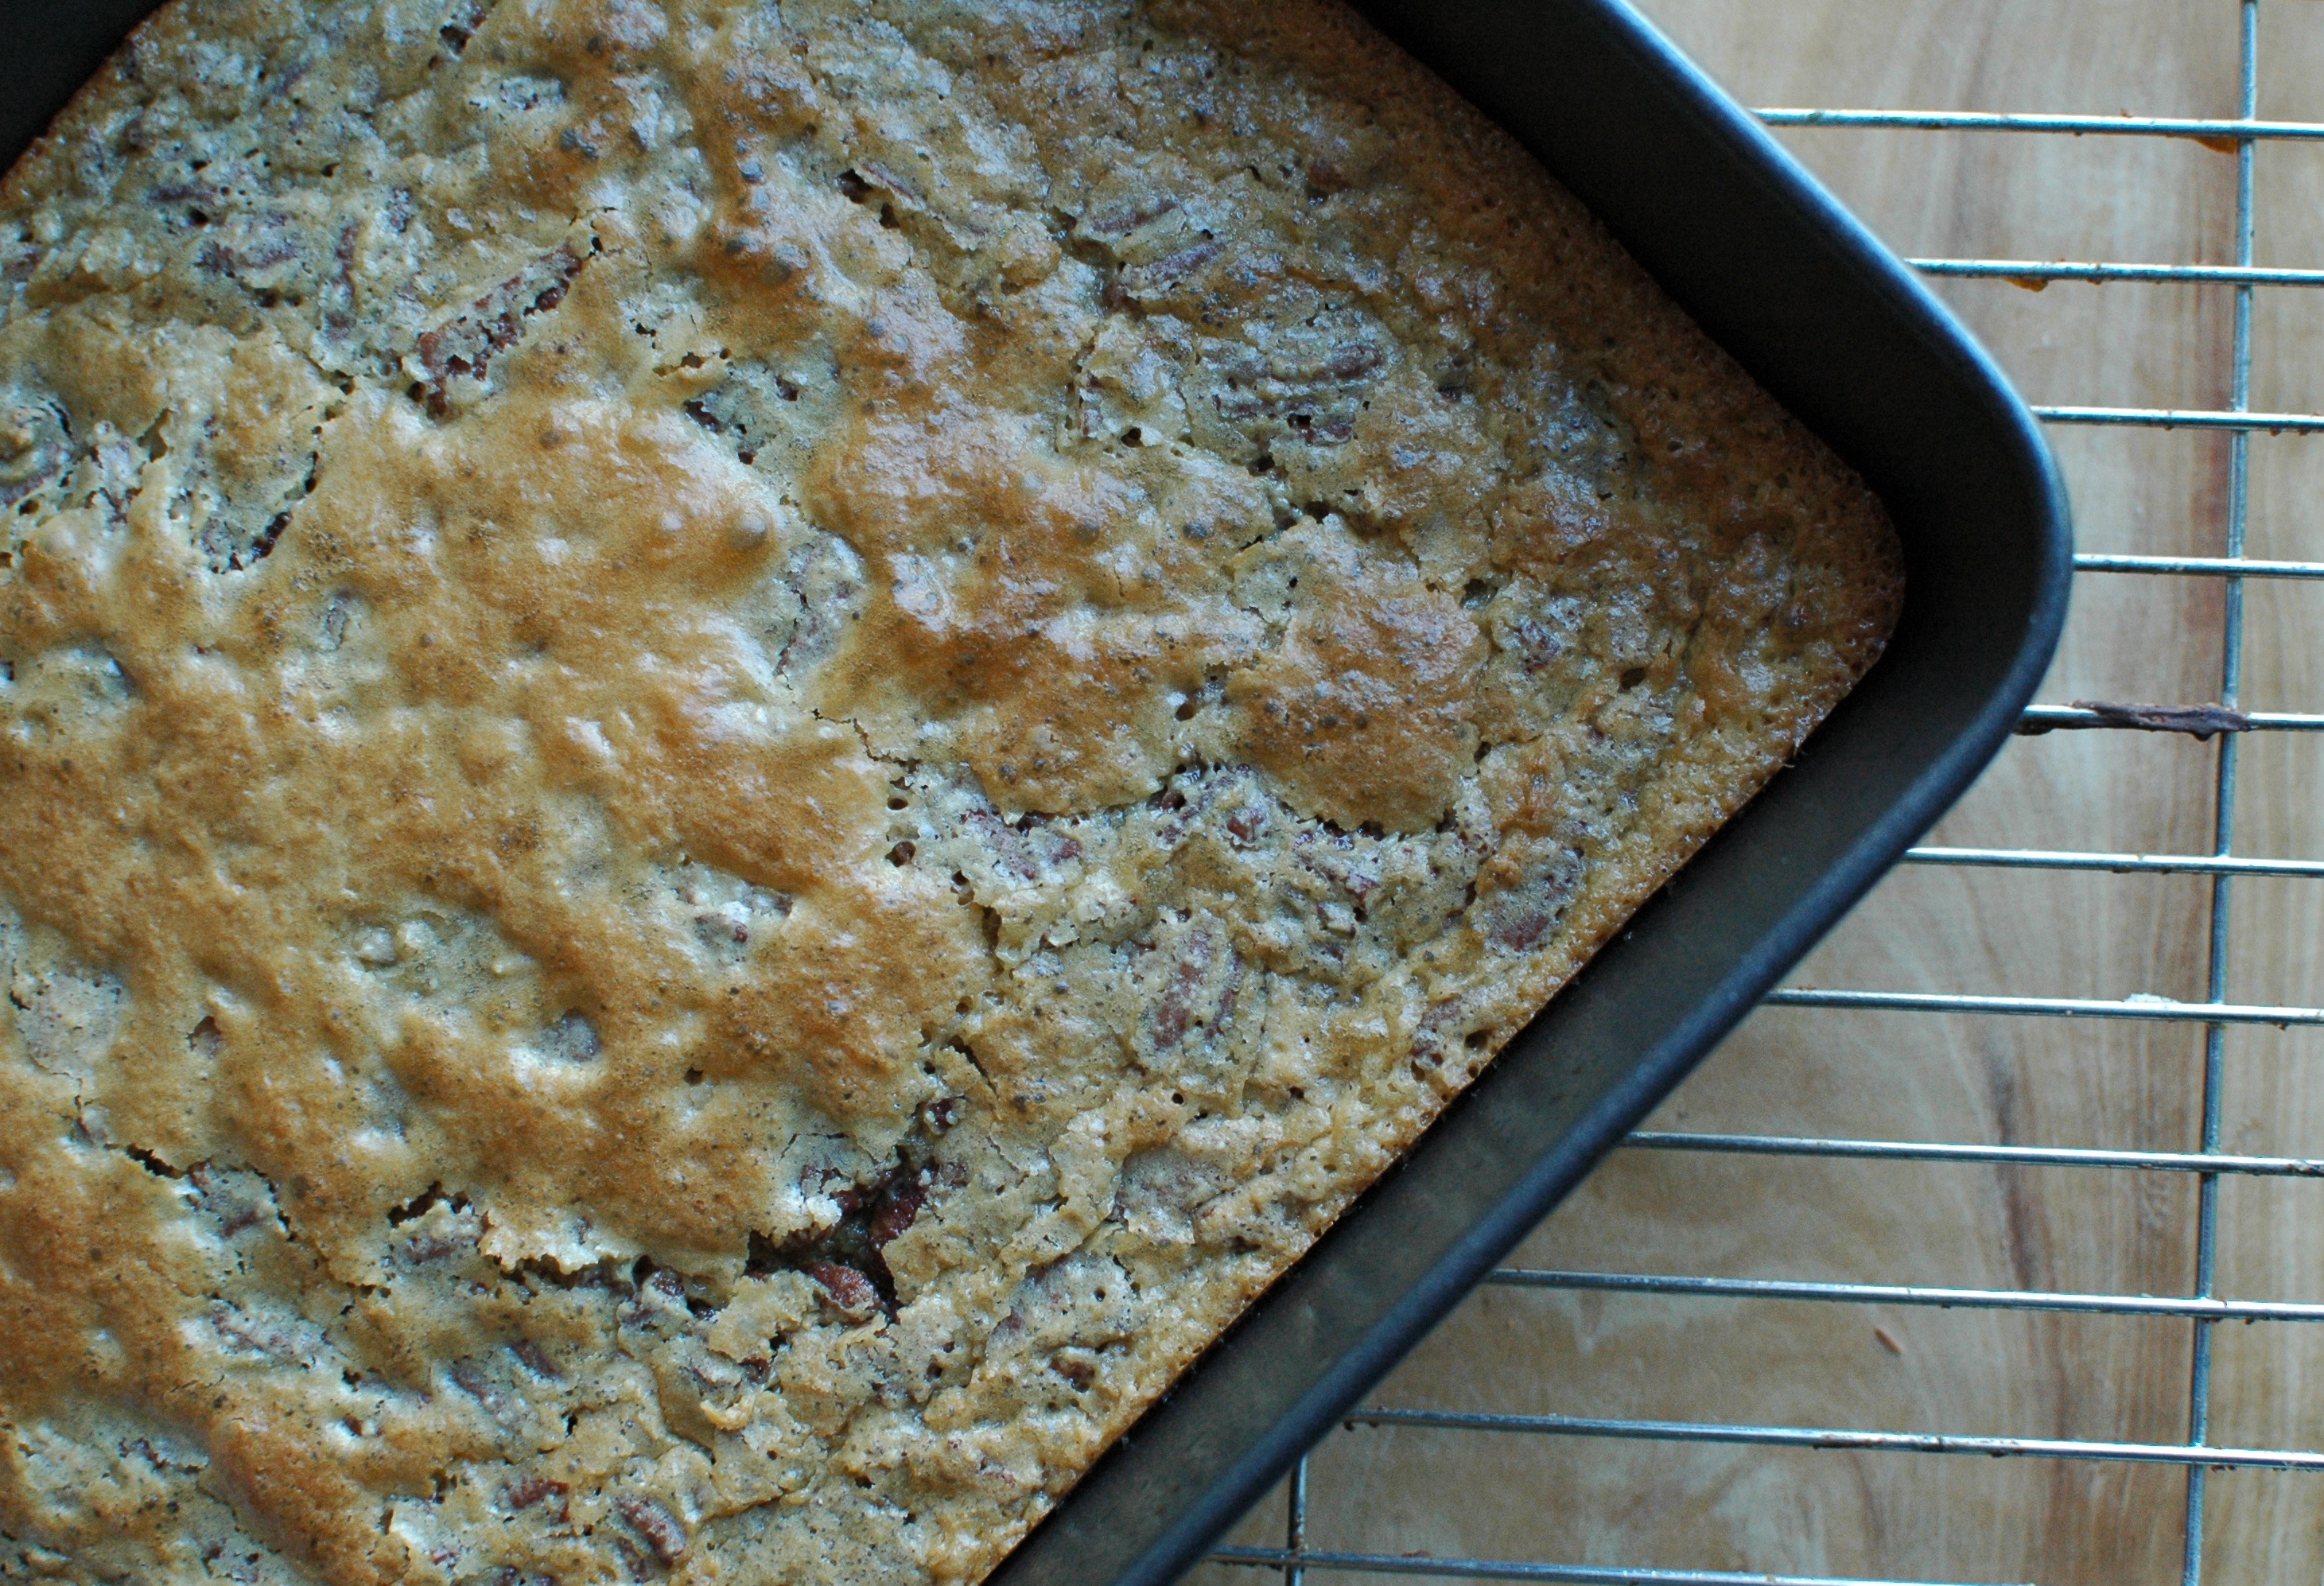
The cake is wonderfully light, so perfect for the summer, doesn’t use too much sugar and is loaded with strawberries. So it’s healthy, right? (I say this as I am half way through eating the second one in two weeks). Pressing the juice out of the strawberries may make the cake look like it’s soggy at first impression but it’s far from it. Staying moist for a couple of days (it does need to be fridged though, and yeah I know you shouldn’t fridge cake).

Strawberry Drizzle Cake 05

Strawberry Drizzle Cake 06
 

Also, I booked my flights to Chicago today to go to RiotFest in Chicago in September. Can’t wait. Can anyone recommend some stuff to do while I’m there? My current plans involve getting fat(ter), drinking a lot and maybe a tattoo.

Strawberry Drizzle Cake
 
Prep time
Cook time
Total time
 
Serves: 8
Ingredients
  • 100g Salted Butter, at room temperature
  • 200g Golden Granulated Sugar, plus 2 tbsp for sprinkling
  • 1 large Egg
  • 120ml Milk
  • 1 tsp vanilla extract
  • 200g Self-raising Flour
  • 400g Strawberries, halved
  • 50g icing sugar
Instructions
  1. Preheat the oven to 180ºC(160ºC fan oven) and grease and line a 23cm cake tin.
  2. In the bowl of an electric mixer, or by hand, cream together the butter and sugar until it’s light and fluffy.
  3. Beat in the egg and the milk. Beating until well combined. Add the vanilla then the flour, beating until well combined and there are no lumps.
  4. Spoon into the prepared tin, shaking slightly to make sure it’s even.
  5. Set 6 of the strawberries aside (these will be used for their juices later) and position the remaining halves, cut side down, on top of the cake. Sprinkle some golden granulated sugar on top of the strawberries afterwards.
  6. Place in the middle of the preheated oven and bake for 50-55 minutes until a toothpick inserted in the middle will come out clean.
  7. Meanwhile, cover the strawberries you set aside with 1tbps of the icing sugar, and leave for around 15 minutes.
  8. Press this through a fine sieve into a bowl to get the juices out. Combine 1tbps of the juices with the remaining icing sugar, whisking until they are combined and leave to thicken.
  9. Once the cake has been removed, allow to cool in the tin for 5 minutes, before transferring to a wire rack.
  10. Drizzle the juice mix over the top of the cake.

Strawberry Drizzle Cake 02


Strawberry Drizzle Cake 03


Review: The Dapper Duke – Gentlemen’s Summer Beard Oil

I’ve recently been in the market for some new Beard Oil. My old one, Mr Natty’s Beard Elixir, leaked out in my bag (ironically breaking my breadtrimmer) a while ago and I’ve been putting off getting something new mainly due to cost. I thought it was about time I bit the bullet, especially with my beard getting a little longer and slightly more unruly recently. I turned to the good people of twitter/my fellow bloggers/my bearded pals and got inundated with suggestions. From Bedfordshire beard co, the Brighton Beard Company and Bear Face to a couple of US based ones like Bath Sabbath and Jack Earl Co.
The Dapper Duke

Wooden Comb

I eventually opted for something from The Dapper Duke, in part due to them offering fairly cheap wooden combs (and I’d been in the market for a new one for ages). For a 10ml bottle of oil it was £7.50 which compares very well with the competition with prices ranging from about £6 to £18. Wooden combs are great for combing beards and combing through oils. As well as for standard hair (my current comb sucks). They have a selection of oils on offer under various categories from Sweet to Citrus and finally “Masculine”. I went for one from the Masculine section as I’m not too keen on overly sweet scents on myself. The oil is their Gentlemen’s Summer Oil which uses orange essential oil with jojoba, argan and almond for a wonderfully fragranced oil. Once combed through it helps shape the beard wonderfully, also helping to soften it up. I’m looking forward to an extended test to see just how well it helps soften the beard. The packaging is also great, with the oil coming in a little pouch with a Dapper Duke plack. A great touch. It also took less than a day between ordering and arriving, and for only £3.50 delivery I really can’t complain. Excellent service and an excellent product. Now I just need to find myself a good barber… Suggestions welcome (Leeds & London).

Beard Oil

Also, it was payday and the sales happened. So I bought things I shouldn’t have.

Can anyone recommend a different oil or a barber? Suggestions in the comments below!

Cinnamon Buns

The last couple of weeks have been really busy. Which means I’ve not been on top of baking new things. I baked for a charity bake sale in Otley, so did some of my older classics, like my brownies and peanut butter cookies as well as some Oreo truffles and a ginger loaf with lime frosting. Unfortunately the charity fair itself flopped a bit, but it was great practice for me doing large orders and I got to take some of the leftovers to my friend’s birthday party.

Peanut Butter Cookies
 
Pistachio Brownies

Then I had an order of brownies for my friend Katie’s final year photography exhibition. I couldn’t make the night myself but apparently there were none left, that’s got to be a good sign right? I was supposed to be climbing a mountain in Scotland this weekend for Wateraid200 but unfortunately lots of people dropped out last minute, meaning it wasn’t possible anymore. We are hopefully re-arranging for a later date when more of us can actually manage it. I raised over £100 so I really don’t like the idea of letting people down.

Cinnamon Buns
 

Because of that being cancelled I had an extra weekend which I wasn’t expecting. This gave me some time which I’ve been using to get my life together a bit. And also to do some baking. I’ve been wanting to make Cinnamon Buns again for a long while, but they take a fairly long time to bake, due to the rising/proofing stages. As I was completely plan-less I thought it was a wonderful opportunity to make them. The last time I did make them, I made them far too large. But I managed to get these ones just right.

Cinnamon Bun Dough

Cinnamon Buns 04

Cinnamon Buns 05


Cinnamon Buns
 
Prep time
Cook time
Total time
 
Serves: 12
Ingredients
  • For the buns:
  • 500g/1lb 2oz strong white flour
  • 1 tsp salt
  • 50g/1¾oz light brown sugar
  • 15g/1oz fresh yeast or 1½ tsp dried yeast
  • 75g/3oz butter, softened
  • 200ml/7fl oz milk
  • 2 free-range eggs, plus one egg yolk, for glazing
  • flavourless oil, for oiling
  • For the filling:
  • 75g Granulated brown sugar
  • 50g granulated white sugar.
  • 3 teaspoons ground cinnamon
  • 50g butter, melted.
Instructions
  1. Mix together the flour, salt and sugar. Stir in the dry yeast (or crumble in fresh, I personally have a store of dry in).
  2. Work the butter into the flour mix until there are no large lumps remaining. Do this with your fingers or using a mixer on a low speed. It doesn’t have to be as fine as breadcrumbs.
  3. Make a well in the center and pour in the milk and one of the eggs. Mix together using a spatula or your hands. It’s quite a sticky mix but keep on mixing and the flour in the mix will slowly absorb the excess liquid.
  4. Turn the dough out onto a clean surface (lightly floured if necessary). Knead the dough for 10 minutes. By the time you are done you should be able to cut a small piece off and stretch it out thin enough to see light through it/the shadows of your fingers.
  5. Place the dough into an oiled bowl, cover with a damp cloth and place somewhere warm to rise for around 80-90 minutes (until it has roughly doubled in size).
  6. Towards the end of this time, make the filling. To do this mix together the sugars and the cinnamon. Add a small amount of the melted butter and mix.
  7. Knock back the dough onto a lightly floured surface and, using a rolling pin, roll out into a rectangle about the thickness of a pound coin.
  8. Using a pastry brush coat the dough with the melted butter then spread the cinnamon mixture over the top.
  9. Roll into a log shape carefully. You don’t want to squash it too much. Divide the log into 12 equal pieces buns.
  10. Place these into a greased pan, spacing them apart for when they rise. Cover with a damp cloth and allow to proof for about 45 minutes. While they are rising, preheat the oven to 200°C(180°C fan).
  11. Before placing in the oven, beat together the remaining egg and the yolk. Brush the top of each bun with this.
  12. Place in the center of the preheated oven and bake for 10 minutes. Then drop the temperature to 180°C (160°C fan assisted) and bake for a further 20 minutes.
  13. Once you have removed them from the oven, transfer to a wire rack to cool.
 
Cinnamon Buns 02

Gluten Free White Chocolate and Pecan Brownies (Diabetic Friendly)

I’ve had requests from a lot of people for some stuff that’s a bit “different”. Well, that’s not really the right word. To sum it up I’m going to do a series of bakes to fit into a “free from” range. Once a month I will do something that could be classed as “free from” i.e. Vegan, gluten free, diabetes friendly etc. To kick things off I’ve gone for a double whammy, which is Gluten Free Diabetic Friendly White Chocolate and Pecan Brownies. I told my friend Steph ages ago that I’d do her some diabetic friendly bakes so this one took priority. Gluten Free White Chocolate Brownies 03   This is the first time I’ve tried my hand at an intentionally gluten free recipe. But damn, it’s good. The brownies are wonderfully chewy and flavourful. The white chocolate (despite being a fairly small amount in comparison to many brownie recipes) comes through well as do the pecans. This is the first time I’ve baked with rice flour. It’s also the first time I’ve baked with just plain margarine instead of butter/oil for ages.
Gluten Free White Chocolate Brownies 01


Gluten Free White Chocolate Brownies 05


It took me a couple of tries to get these just right and a couple of points I’m going to raise now are these. You *have* to line the bottom of the tray to make sure that you can get these out without them sticking to the bottom. Also, they will look like they are done after about 20 minutes, but make sure you bake them for the full 30 minutes! Gluten Free White Chocolate Brownies 02 Gluten Free White Chocolate Brownies

Gluten Free White Chocolate and Pecan Brownies (Diabetic Friendly)
 
Prep time
Cook time
Total time
 
Ingredients
  • 75g (2¾oz) gluten-free white chocolate
  • 75g (2¾oz) polyunsaturated margarine
  • 175g (6oz) light soft brown sugar
  • 2 eggs, beaten
  • A few drops vanilla extract
  • 50g (1¾oz) ground almonds
  • 1 heaped tablespoon rice flour
  • 100g (3½oz) pecans, toasted and roughly chopped
Instructions
  1. Preheat the oven to 180ºC (160ºC fan assisted). Grease and line a brownie tray of 18x28cm.
  2. Melt the chocolate with the margarine (I used a bowl over hot water). Stirring constantly.
  3. Stir in the remaining ingredients one at a time. Mix well.
  4. Pour in to the prepared tin and place in the middle of the preheated oven.
  5. Bake for about 30 minutes.
  6. Remove and leave in the tin. Allow to cool in the tin until completely cool.
  7. Remove and divide up how you please.
 

Boston Cream Pie Cupcakes

Update time! At last! It’s been a couple of weeks since my last proper update. And well, it’s been a very busy few weeks. From bank holiday shenanigans, to all sorts of gigs and hangs, to a trip to Belgium for Groezrock and jaunts to various bits of the country. Groezrock was the most fun I think I’ve had at a festival ever. And I’ve been to about 20 or something silly like that. It included some of my favourite bands, some of my closest friends and very long (7 years!) overdue Myspace meet-up (HI STEPH. Yup, those are still a thing, even though I deleted mine about 4 years ago).

Boston cream pie cupcake 02

Boston cream pie cupcake 06

However, the baking as still continued, even if the blogging hasn’t. So it’s past time that I actually uploaded a recipe. I’ve got a couple more to come soon (I hope). I’m going to start doing a gluten free/diabetes themed bake once a month and the first of those will be up later this week (White chocolate and pecan gluten free blondies). The recipe that I’m uploading now however, is Boston Cream Pie Cupcakes. These were done on request for the American lady at work. It was her birthday and she requested a full Boston Cream Pie, which to take in to work and divide out amongst workmates would have just been too awkward/messy. So I decided on individual cupcakes. The key with these is the cream filling, which needs to be properly thick and creamy. Not just your standard whipped cream. Then the topping needs to be a proper chocolate ganache.

Boston cream pie cupcake 05

These went down a storm and I earned a few brownie points along the way. I found the recipe here. I also have cup measurers now, so as I’m feeling ultra lazy I’m not going to convert from them (for now) sorry! I may at a later date.

Boston cream pie cupcake 03

Boston cream pie cupcake 04

Boston Cream Pie Cupcakes
 
Prep time
Cook time
Total time
 
Serves: 12
Ingredients
  • 1⅓ cups heavy cream
  • 3 egg yolks
  • ⅓ cup granulated sugar
  • Pinch of salt
  • 4 teaspoons cornstarch
  • 2 tablespoons unsalted butter, chilled and cut into 2 pieces
  • 1½ teaspoons vanilla extract
  • For the Cupcakes:
  • 1¾ cups all-purpose flour
  • 1 cup granulated sugar
  • 1½ teaspoons baking powder
  • ¾ teaspoon salt
  • 12 tablespoons unsalted butter, softened but still cool, cut into 12 pieces
  • 3 eggs
  • ¾ cup whole milk
  • 1½ teaspoons vanilla extract
  • For the Chocolate Glaze:
  • ¾ cup heavy cream
  • ¼ cup light corn syrup
  • 8 ounces bittersweet chocolate, finely chopped
  • ½ teaspoon vanilla extract
Instructions
  1. Start with the Pastry Cream. Heat the cream in a medium sauce pan over medium heat. Bring it to a gentle simmer stirring frequently.
  2. Meanwhile beat together the yolks, salt and sugar. Add the cornstarch and whisk until it’s yellow and thick.
  3. When the cream has reached its full simmer whisk in the yolk mixture. Returning it to the heat and whisking constantly for about 1 to 2 minutes until it’s thick and glossy.
  4. Remove from the heat and whisk in the butter and vanilla extract until the butter is completely melted. Pour in to a bowl and push clingfilm onto the top of it. Place in the fridge to set. This will take at least 2 hours.
  5. For the cupcakes. Preheat the oven to 180°C (160°C fan). Line a muffin tray with cases.
  6. In a large bowl mix together the flour, sugar baking powder and salt. Add the butter one small piece at a time and continue to mix on a low speed until the mixture resembles bread crumbs.
  7. Add the eggs one at a time. Beating well after each addition and scraping down the sides after each one.
  8. Add the milk and vanilla, increasing the speed of your mixer to medium and beat until it’s light and fluffy (around 3 minutes). There should be no lumps remaining.
  9. Fill the cases ¾ full and place in the middle of the pre-heated oven. Bake for 18-20 minutes. A tooth pick inserted into the middle should come out clean. Allow to cool for a few minutes in the pan before transferring to a wire rack to cool completely.
  10. Make the Ganache. Combine the cream, corn syrup, chocolate and vanilla in a saucepan over a medium heat. Stirring constantly to prevent it from catching. Mix until the mixture is completely smooth. Set aside and allow to cool/thicken at room temperature, at least 30 minutes.
  11. Assembling the cakes. Using a small knife cut a small circle from the middle of the cake, about half way down into the cake. Carefully take this cone out and cut away most of the base so it just has a “lid” left. Using a piping bag/syringe with no nozzle, pipe the cream mixture into the centre of the cake before returning the lid and pushing down to make the top of the cake flat again.
  12. Spoon the ganache over the top of the cakes and place in the fridge them to set.
 
Boston cream pie cupcake 01